
A Real Atari 2600 and a Real CRT, Somehow in a Handheld
Published October 11, 2026
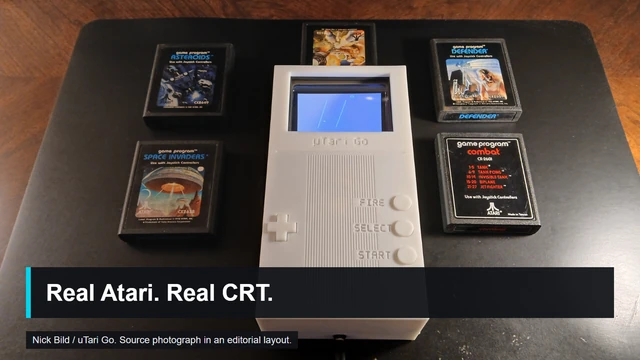
Nick Bild's completed project; original chips and an actual CRT, not an emulation mockup.
Nick Bild's uTari Go puts original Atari chips, cartridges, and a four-inch CRT into a custom printed enclosure. No emulator, no FPGA.
There are easier ways to play Atari games in your hands. Nick Bild chose the entertainingly difficult one: keep the original machine's chips, keep the cartridges, and put a real CRT in the case.
The result is uTari Go, a handheld Atari 2600 project published on October 7. At its center are the original 6507 CPU, TIA, and RIOT, rather than a software emulator or an FPGA recreation. Its display is a four-inch CRT. The enclosure is custom and 3D-printed. This is Bild's independent project, not an Atari product or an endorsed collaboration. Original build.
"Handheld" needs one clarification: Bild documents a 12-volt external power input. Holding a console is not the same as carrying a battery-powered portable. The distinction does not make the build less striking; it makes the engineering choices clearer.
First, Shrink the Console
The earlier uTari motherboard made the handheld possible. Bild reduced an original board of roughly 9.75 by 5.25 inches to about 4.7 by 3.5 inches, while retaining the core Atari chips.
The board did not get smaller by making the old silicon more modern. It got smaller by removing and replacing the surrounding hardware that a home console needed: large switches, full-sized ports, the RF modulator, and empty board area. A simpler composite-video circuit takes the place of the RF stage.
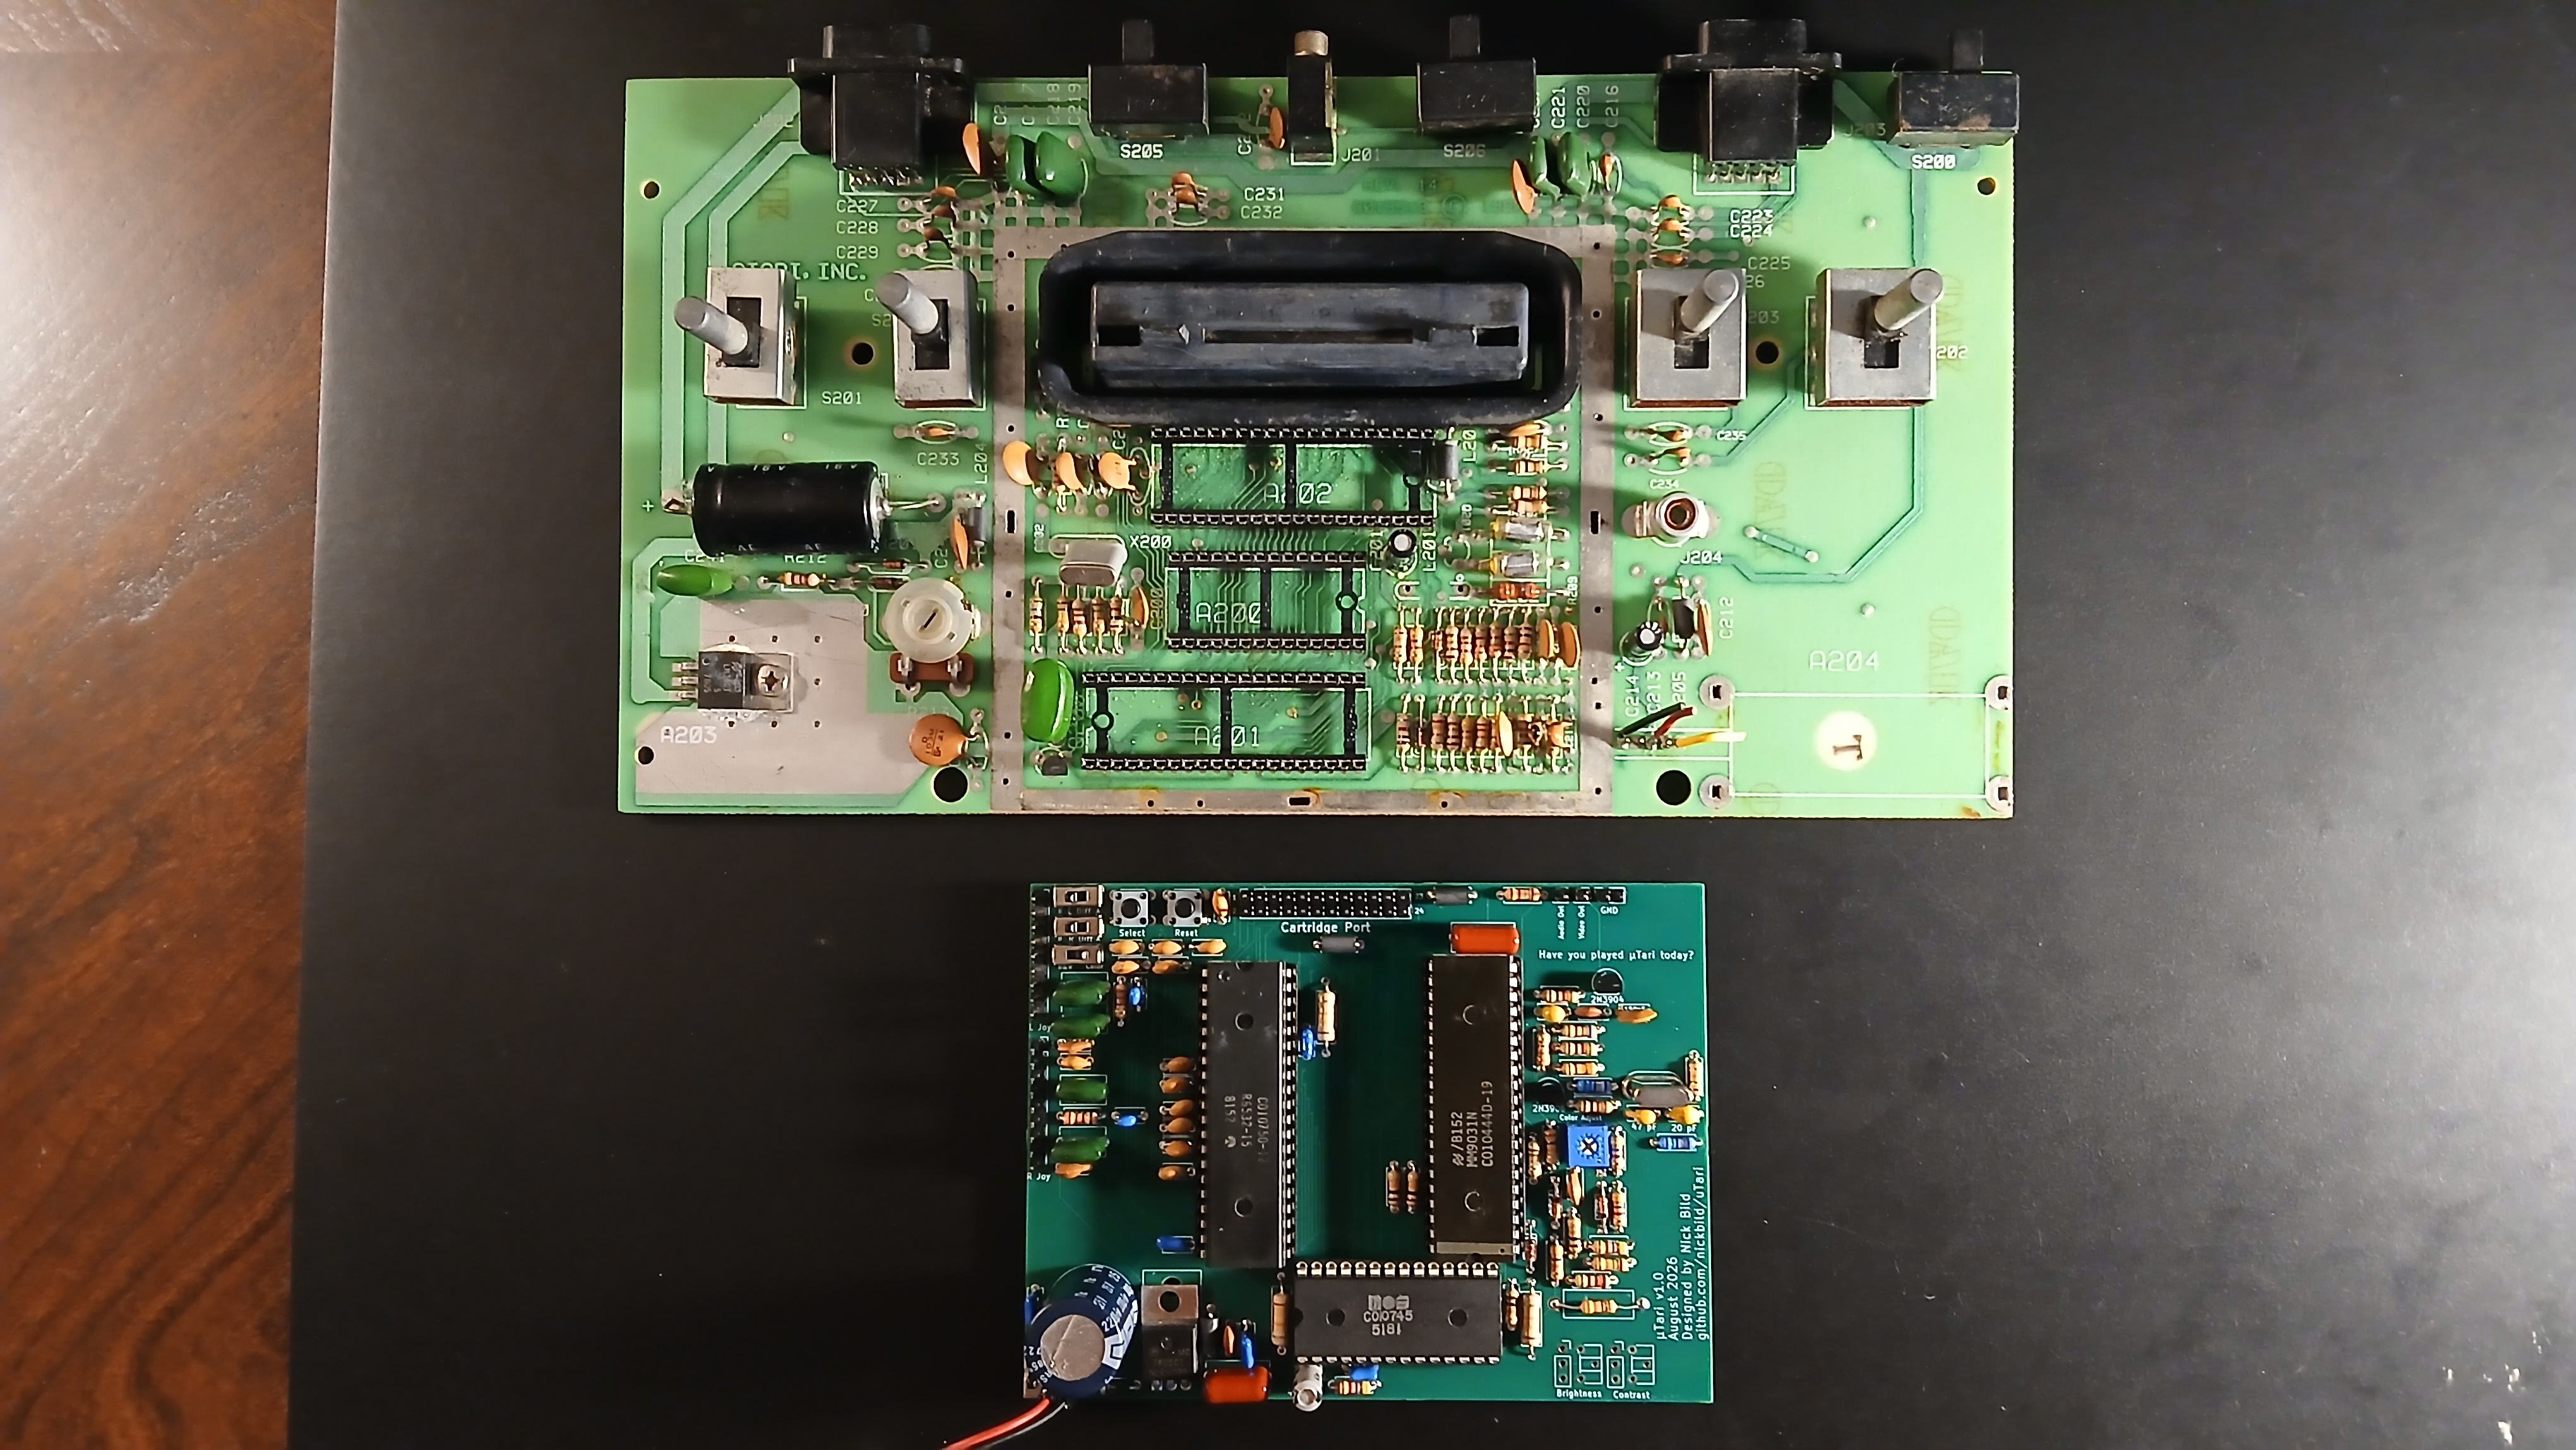
That is an instructive kind of miniaturization. Before choosing a new processor, ask which parts of a system belong to its actual job and which belong to its original packaging. A television connection designed for one era may not be necessary in a self-contained device. A bulky front-panel switch can become a small switch when the enclosure no longer has to match the original console.
The result is not automatically a better general-purpose replacement board. It is a board suited to a different set of constraints.
Then Make the Screen the Constraint
The CRT is the decision that gives this build its character. Composite video connects directly to the display, so a digital panel is not standing in for the original display technology. Bild's documentation makes clear that the CRT also makes the handheld substantially bigger than an LCD version would be.
That tradeoff is the point. An emulator on a small flat screen pursues convenience. This project pursues a particular physical experience. The glass, depth, weight, and analog image are not accidental overhead to eliminate once a photograph is taken. They are part of what is being built.
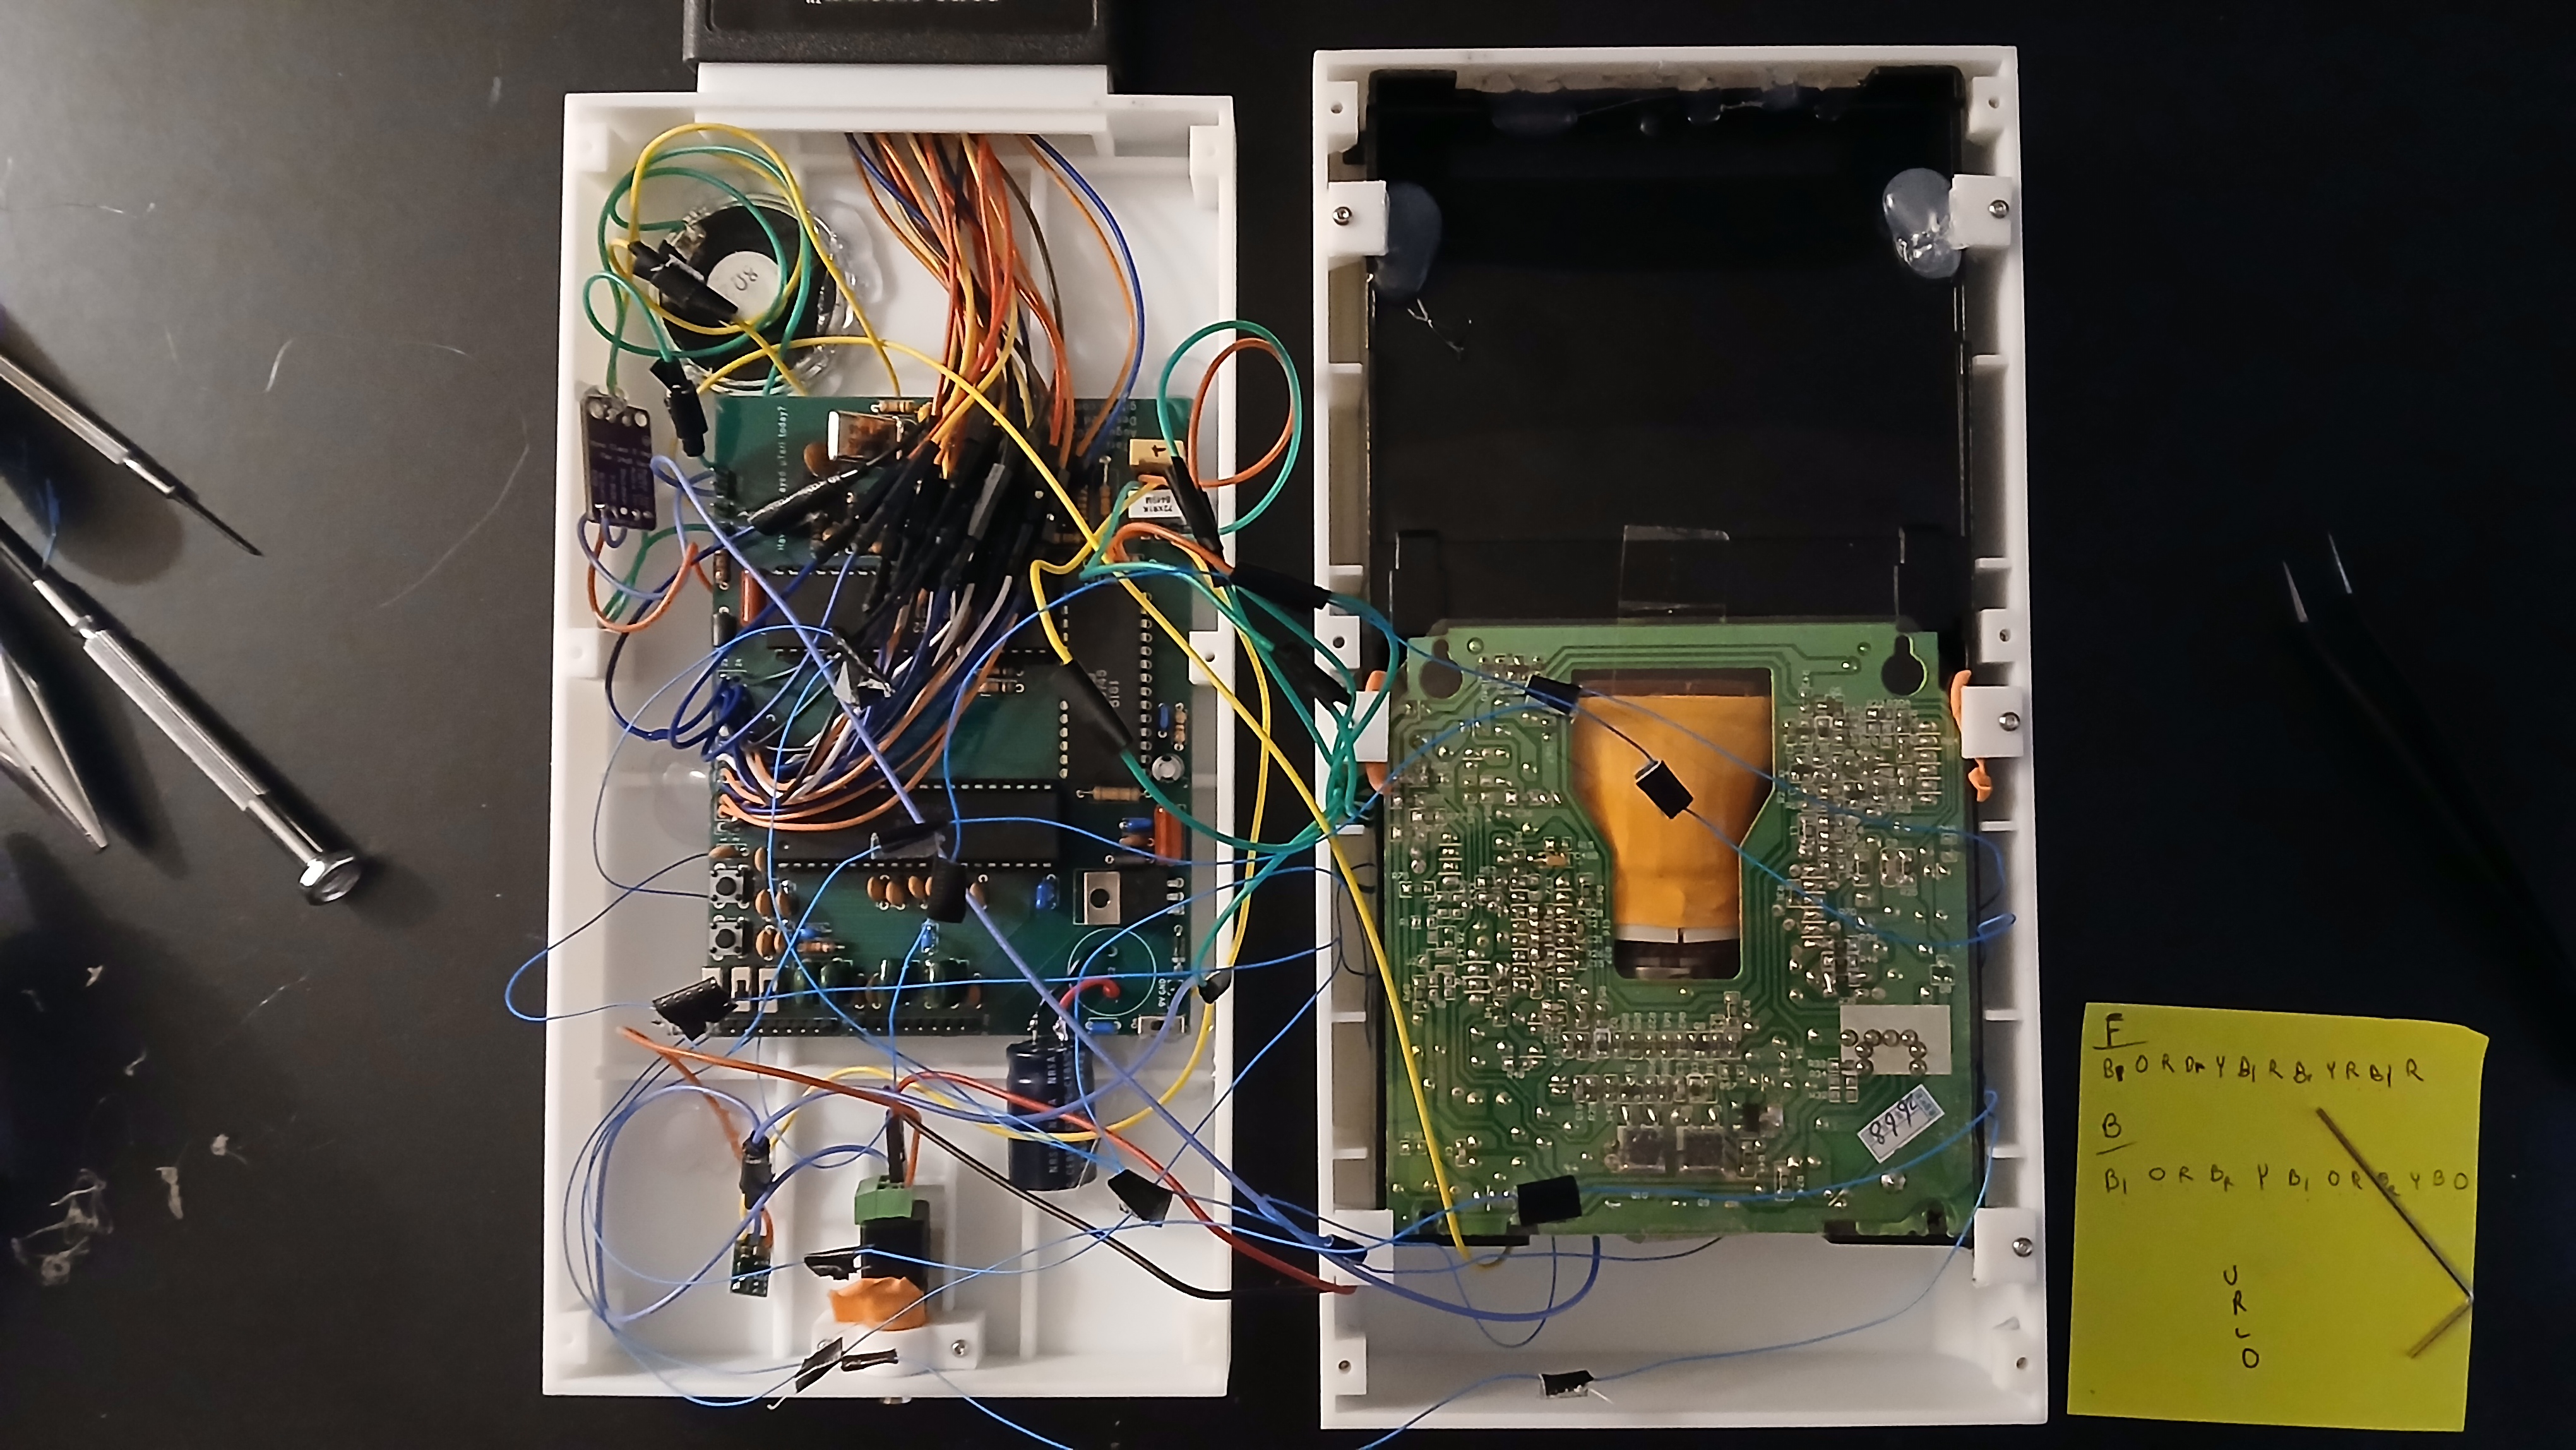
There is a practical boundary for would-be builders. CRT hardware can involve dangerous voltages and stored energy. A gallery and a model file are not a substitute for competence with that hardware. Do not open or modify an unfamiliar CRT because a finished enclosure makes it look like a simple handheld accessory.
For less experienced makers, the safe, useful lesson is the packaging strategy, not an invitation to begin with the high-voltage subsystem.
The Cartridge Is Not Decorative
Bild uses a cartridge edge connector so the machine can play original Atari 2600 cartridges. That makes the top opening a functional interface, not a nostalgic prop. It has to line up, retain the connector, and leave enough room for insertion and removal.
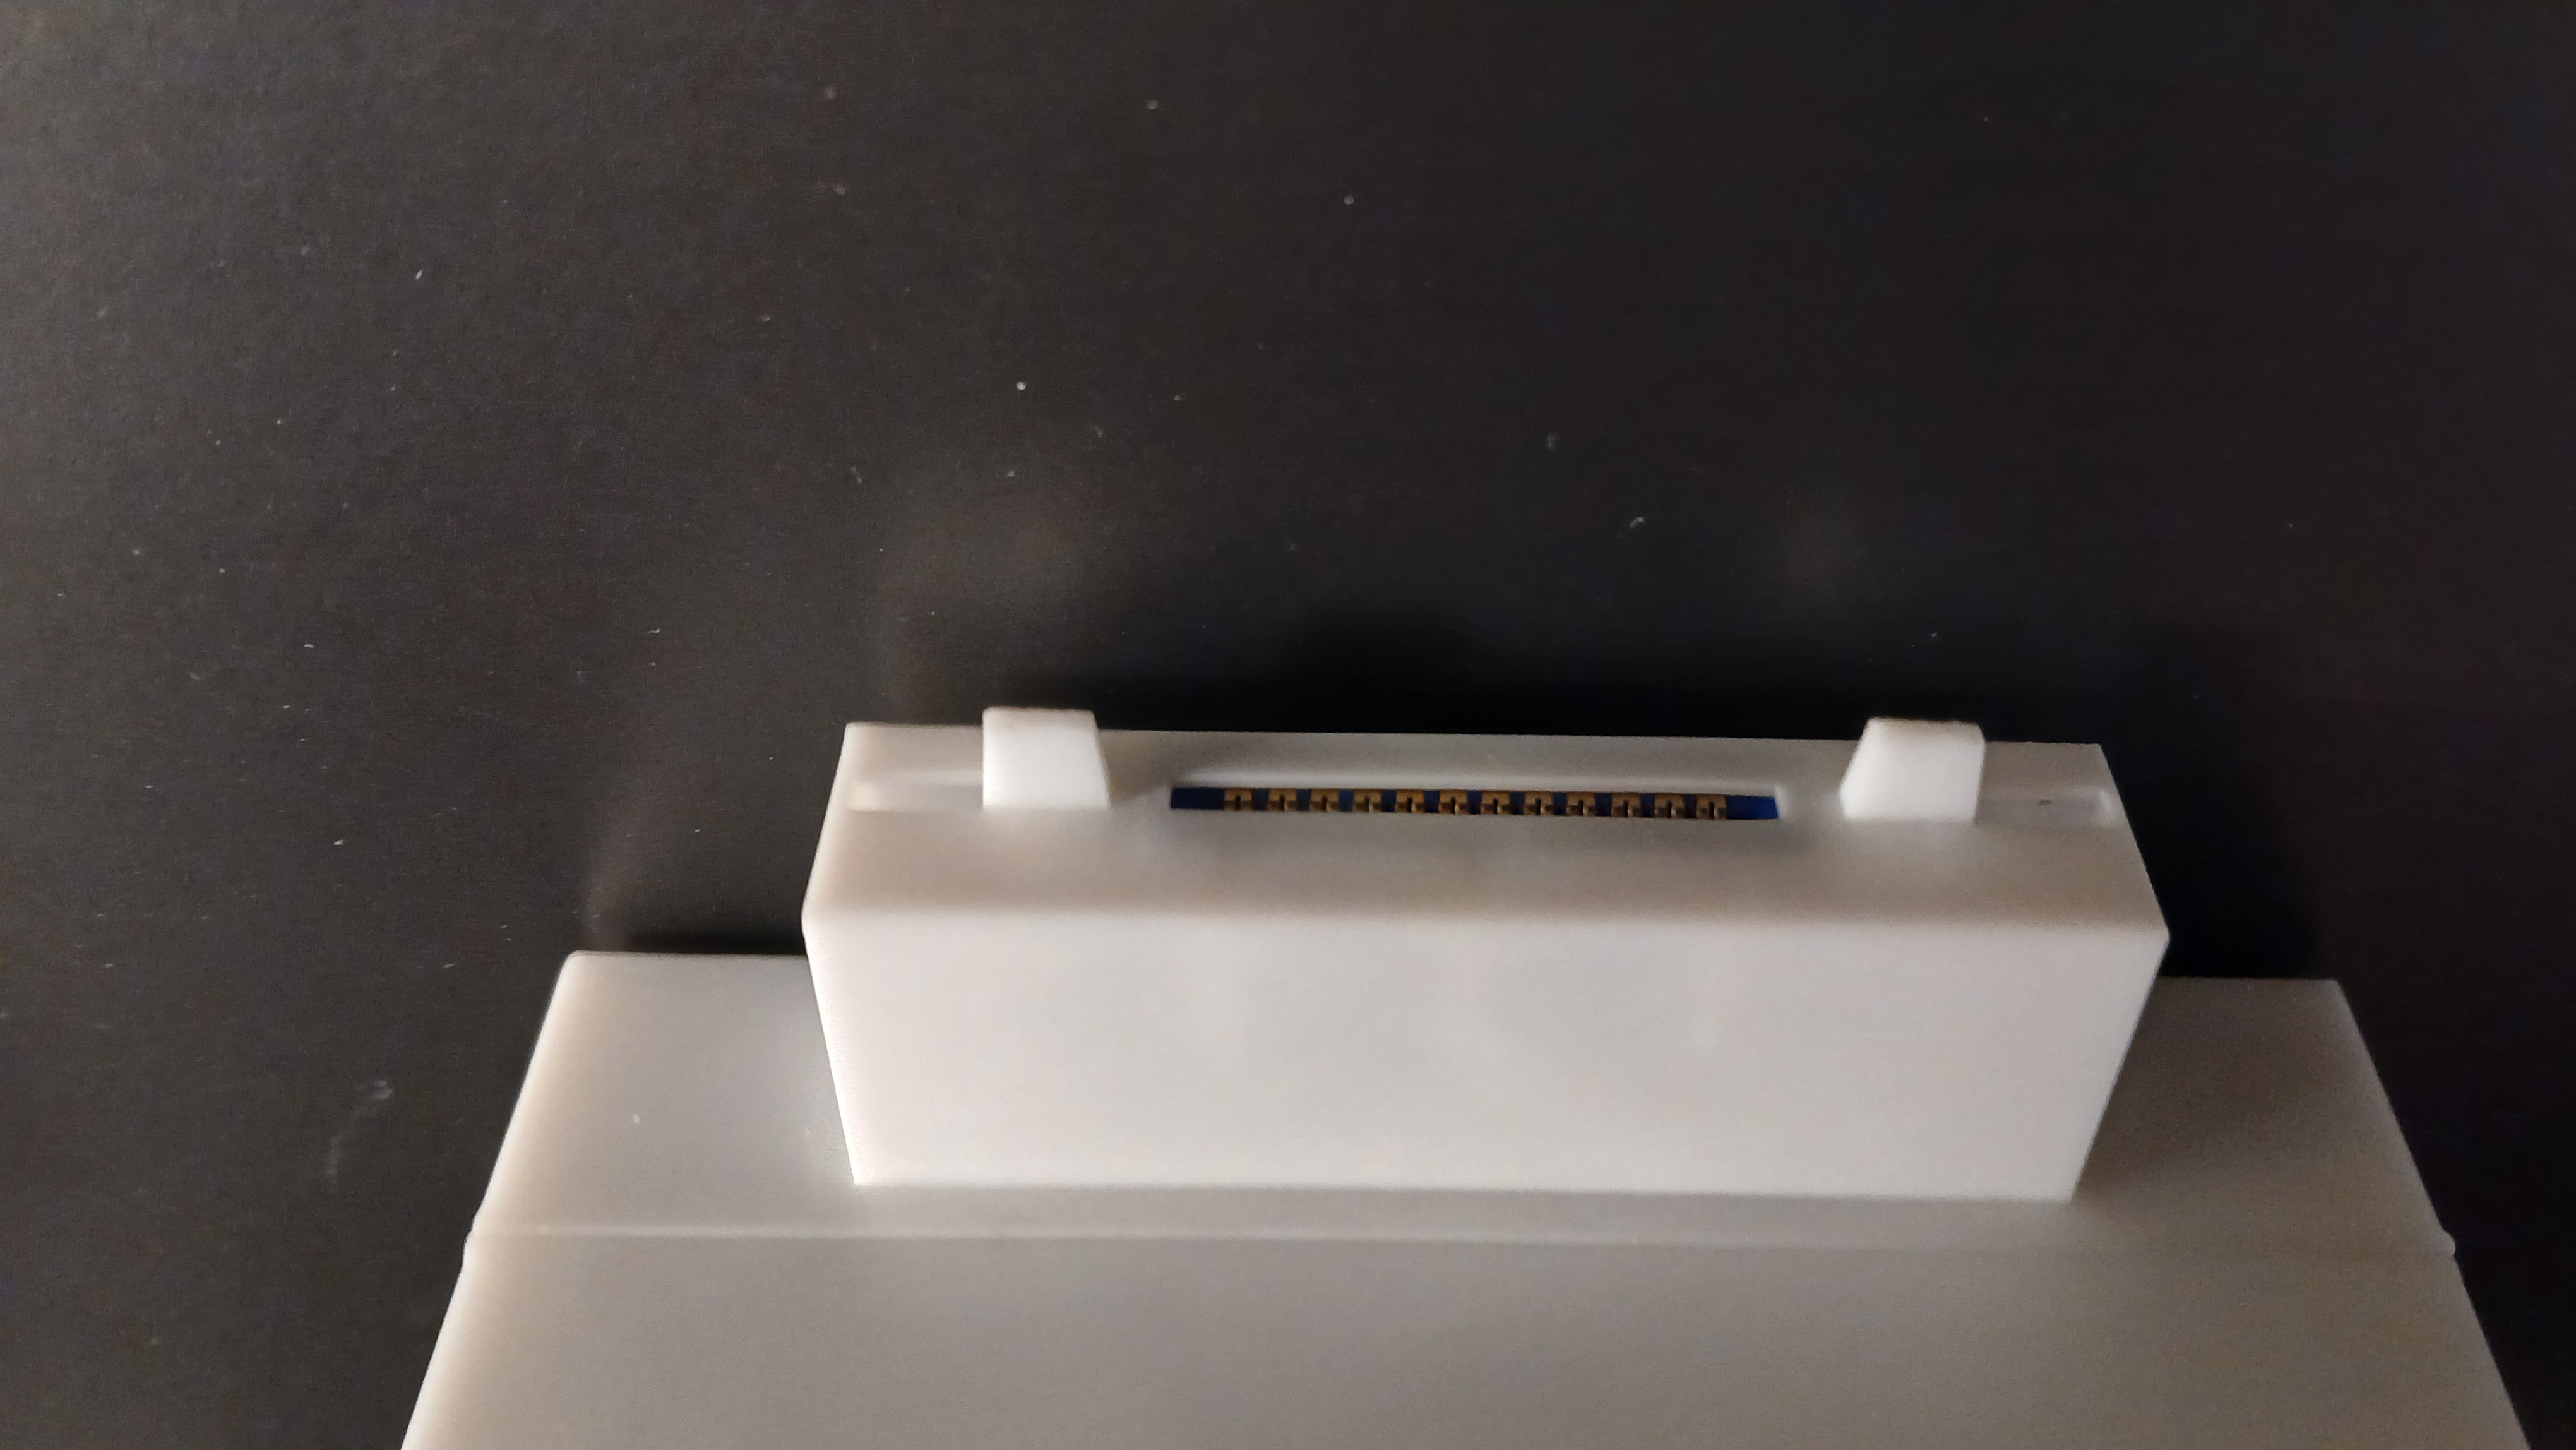
Any enclosure designer recognizes the problem. A connector that works on a bench can become awkward inside a shell. Fingers need room. The force of insertion should not simply be passed into an unsupported board. The part that users touch repeatedly deserves as much attention as the part that looks impressive in the schematic.
Those are design implications, not claims about tests Bild has published. They are also why hardware projects become more interesting once the wiring is no longer lying loose on a table.
Buttons, Sound, and Power Finish the Job
The documented controls use seven pushbuttons, with four under a printed D-pad and dedicated Fire, Select, and Start functions. A PAM8302 amplifier drives the speaker. A regulated supply supports the Atari board while the CRT uses the incoming 12-volt supply.
The case includes separate shells and internal mounting parts. That matters because the printed enclosure is doing several jobs: protecting the assembly, locating the controls, supporting the display, and making the result holdable. It is not just a box wrapped around a PCB.
The public repository contains the build writeup and printable models. Check its current files and component requirements before treating a parts list as a complete purchasing plan. Vintage hardware availability, screen condition, and individual mechanical tolerances can make two attempts less interchangeable than a list suggests. uTari Go repository.
A Good Build Does Not Need to Be the Easiest One
What makes uTari Go appealing is that its objective stays coherent. It is not pretending to beat modern handhelds on size or convenience. It is asking how much of a specific machine can survive a move into a different format.
The CPU is real. The cartridge interface is real. The CRT is real. The new work is the way those pieces are rearranged and supported.
For makers, that is a useful counterweight to projects where adding a faster board is the answer to every question. Sometimes the interesting challenge is keeping the old constraints and changing everything around them.
Would you keep the CRT, or trade it for a slimmer screen? Tell us which part of the original machine you would refuse to lose in the comments below.
Sources and original creator: Nick Bild's October 7 build, uTari Go, and uTari motherboard. Photographs and documentation are distributed with their MIT license notices in the image-credit details.
Comments
Member comments are temporarily unavailable.
Log in to join the discussion.