Turn an ESP32 into a Browser Oscilloscope
Original writeup by Bojan Jurca
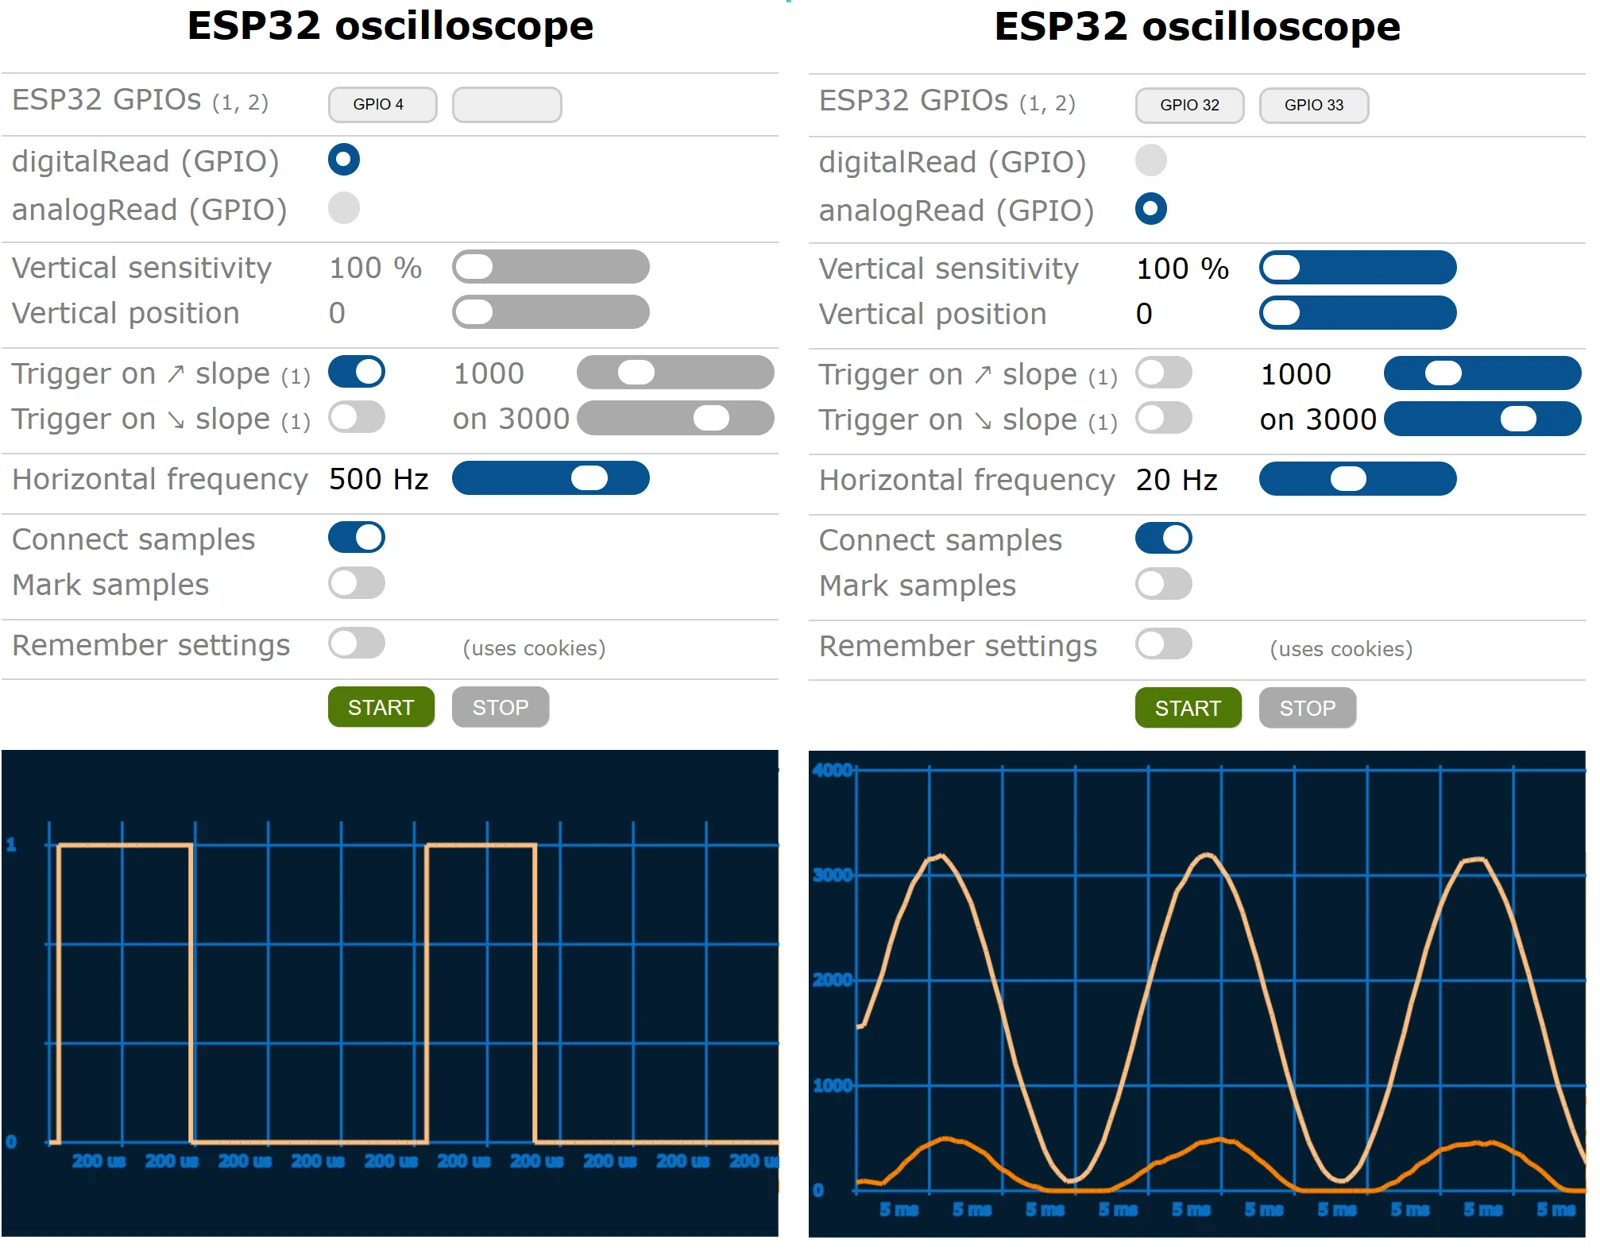
Photo credit
oscilloscope.png
Bojan Jurca · MITResized without cropping and converted to a WebP reading preview. Full-resolution original remains available.
Before you build
A useful way to inspect what an ESP32 is sampling, not a replacement for a protected bench oscilloscope. The author explains why sampling intervals can vary and why displayed values are not necessarily the exact input signal. Restrict experiments to compatible low-voltage signals: do not connect mains voltage or signals outside the board's input limits. The setup formats flash storage and describes an unauthenticated FTP upload; keep it on a trusted local network, and back up existing data first. All original setup instructions and caveats follow.
Bojan Jurca's complete setup guide for displaying ESP32 GPIO samples in a web browser, including the original interface screenshot, library requirements, FTP commands, and ADC limitations.
ESP32 Oscilloscope with Web User Interface
Demo ESP32 oscilloscope:
The latest changes
The latest release works more smoothly, is more stable, and provides an improved user experience — especially on smartphones.
It no longer includes the HTTP server directly. It now depends on the separate Arduino library ESP32_Multitasking_Network_Suite.
You can install the library through the Arduino IDE or download it from GitHub:
-
ESP32_Multitasking_Network_Suite
https://github.com/BojanJurca/Multitasking-Http-Ftp-Telnet-Ntp-Smtp-Servers-and-clients-for-ESP32-Arduino-Library -
WolfSSL (if HTTPS server is beeing used)
https://github.com/wolfSSL/Arduino-wolfSSL
About the ESP32 oscilloscope
Esp32 oscilloscope takes up to 736 samples per screen but the sampling rate may not be completely constant all the time since there are other processes, (beside the sampling process itself, especially if you are using Esp32 oscilloscope as a part of other projects) running at the same time. ESP32 may also not always be able to keep up with the desired sampling frequency.
Esp32 oscilloscope displays the samples as they are taken which may not be exatly the signal as it is on its input GPIO. The samples are represented by digital values 0 and 1 or analog values from 0 to 4095 which corresponds to 0 V to 3.3 V.
You are welcome to modify oscilloscope.html to match your needs, meaning, specify which GPIOs are actually used as digital inputs and which as analog inputs, to make some sense of what signals you are about to monitor.
ESP32 oscilloscope was first meant to be just a demonstration of the Multitasking-Esp32-HTTP-FTP-Telnet-servers-for-Arduino (https://github.com/BojanJurca/Multitasking-Esp32-HTTP-FTP-Telnet-servers-for-Arduino) capabilities and is still fully included there, but it seems to be better off on its own. Only functionalities necessary for an oscilloscope to work are used here.
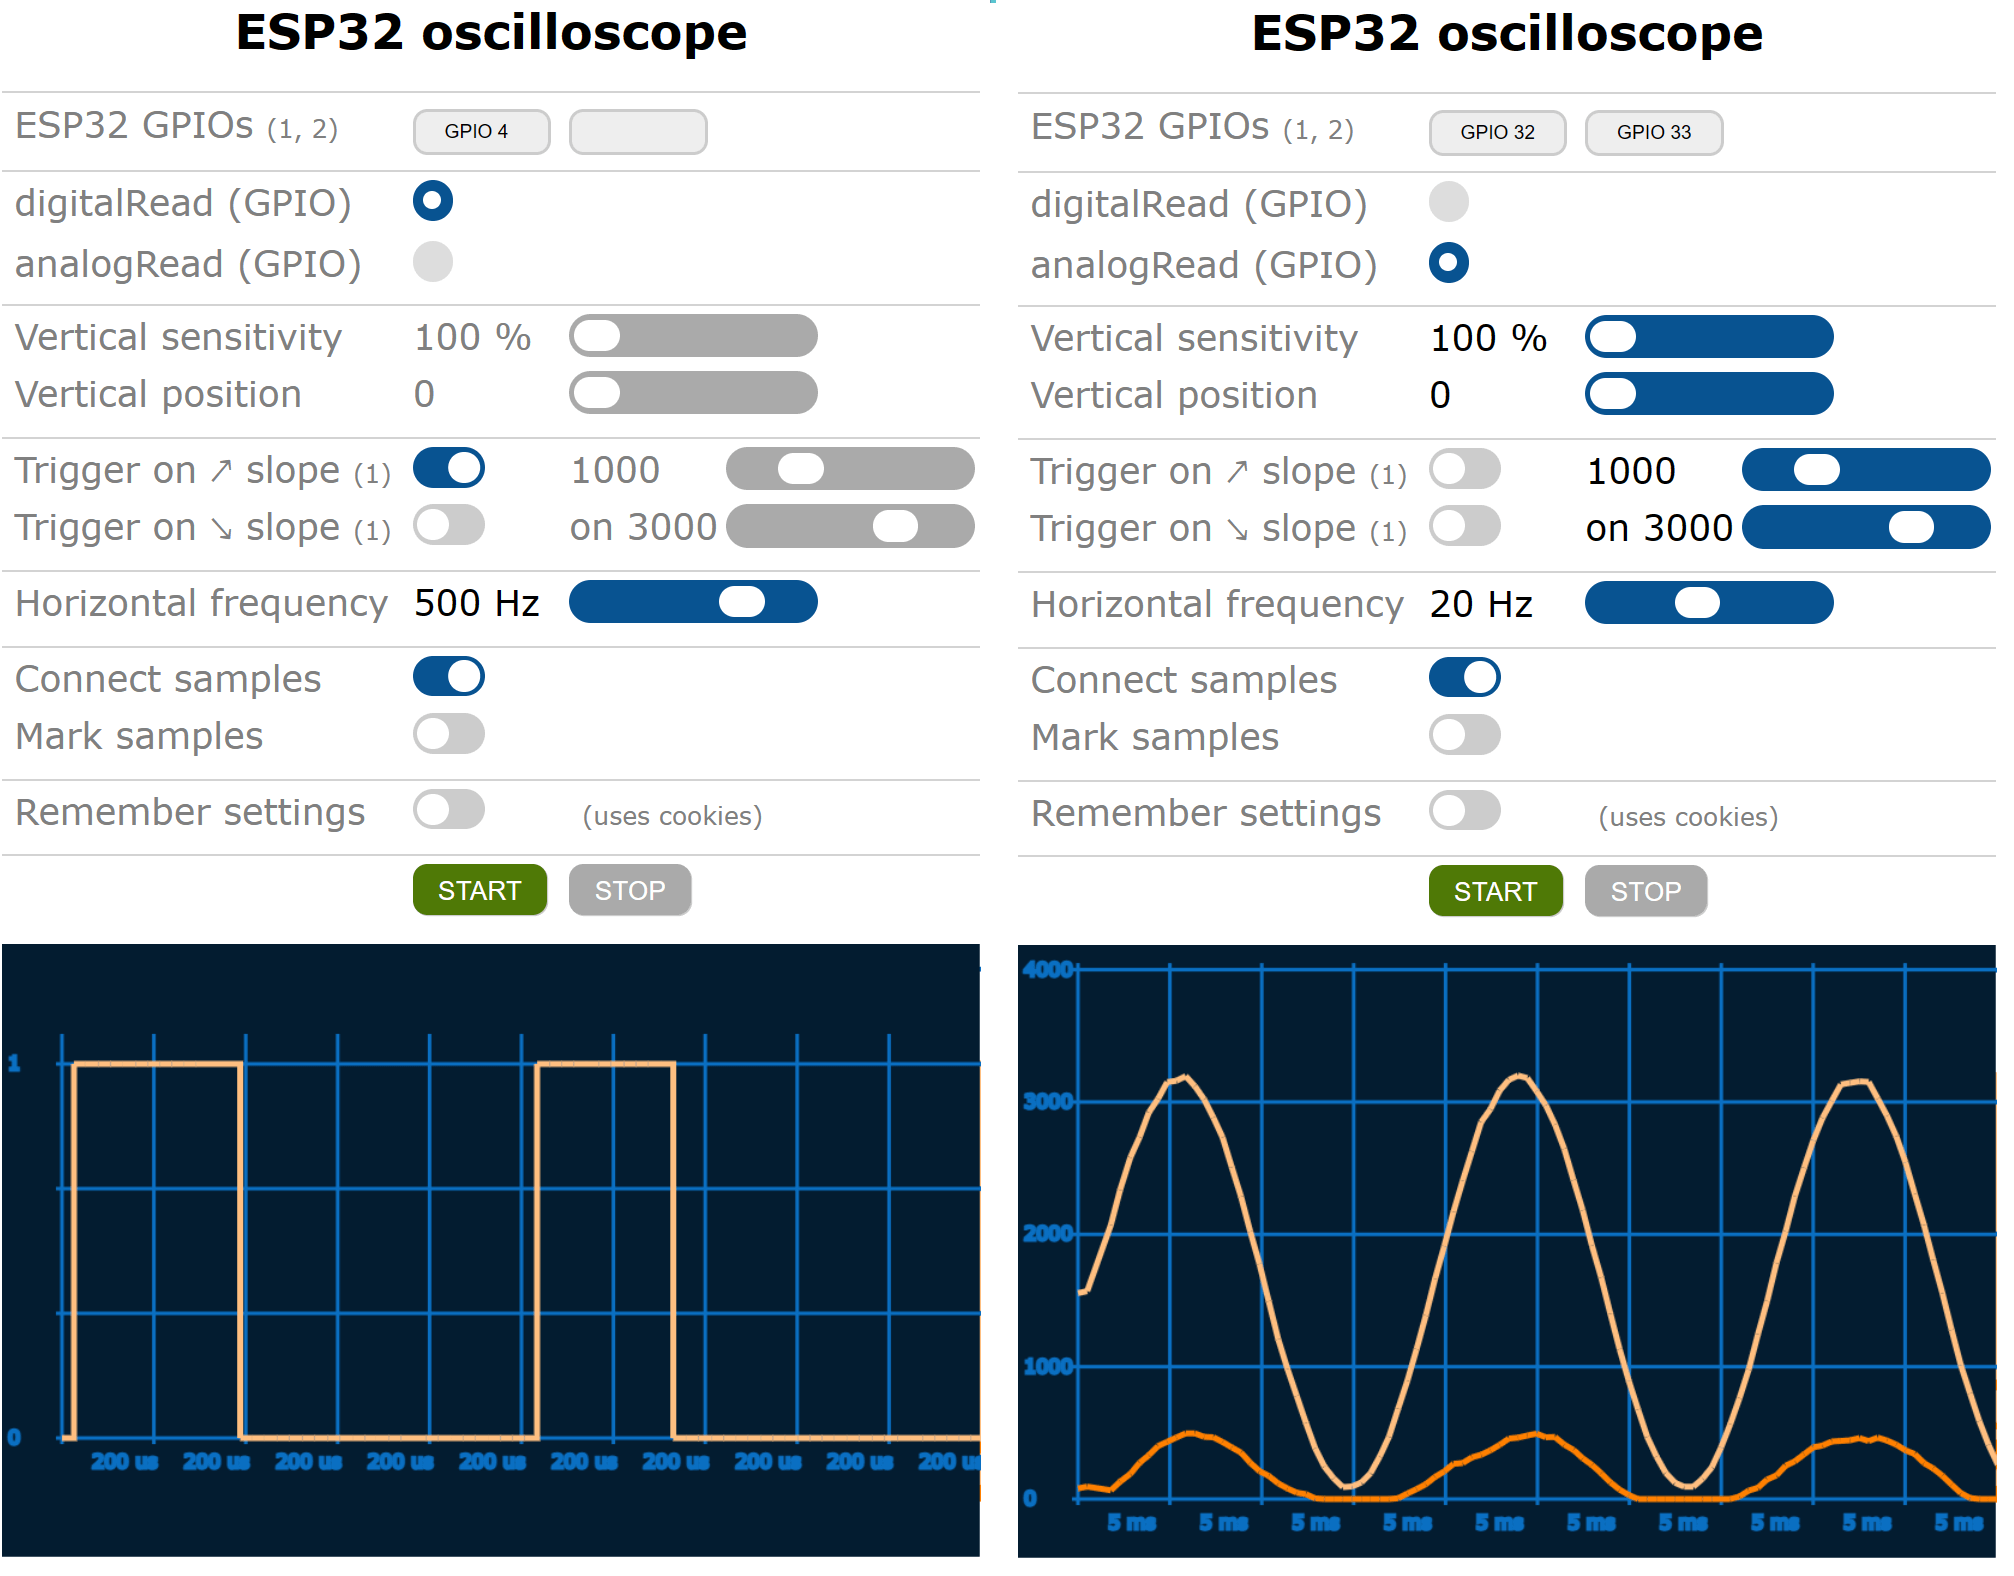
Photo credit
Setup instructions
-
Copy all files in this package to the Esp32_oscilloscope directory.
-
Open Esp32_oscilloscope.ino with Arduino IDE.
-
Find and change YOUR-STA-SSID to your WiFi SSID and YOUR-STA-PASSWORD in Esp32_servers_config.h file to your WiFi SSID and password.
-
Oscilloscope uses LittleFS file system so select one of SPIFFS partition schemas (Tools | Partition scheme | ...).
Some ESP32 boards do not have a flash disk. In this case just comment out the line #define FILE_SYSTEM FILE_SYSTEM_LITTLEFS and ESP32 oscilloscope will use progmem instead of the file system to store the oscilloscope.html file.
-
Compile the sketch and run it on your ESP32 for the first time. Doing this, ESP32 flash disk will be formatted with the LittleFS file system. WARNING: every information you have stored into ESP32s flash memory will be lost.
-
FTP to your ESP32 (By using ftp command line utility or Windows explorer. User name and password are not required) and upload the following files to /var/www/html directory:
- android-192-osc.png,
- apple-180-osc.png,
- oscilloscope.html.
C:\esp32_oscilloscope>ftp YOUR-ESP32-IP
Connected to 10.0.0.3.
220-ESP32 FTP server - everyone is allowed to login
User (10.0.0.3:(none)):
331 enter password
Password:
230 logged on, use "/" to refer to your home directory "/"
ftp> put android-192-osc.png /var/www/html/android-192.png
226 /var/www/html/android-192-osc.png transfer complete
ftp> put apple-180-osc.png /var/www/html/apple-180.png
226 /var/www/html/apple-180-osc.png transfer complete
ftp> put oscilloscope.html /var/www/html/oscilloscope.html
226 /var/www/html/oscilloscope.html transfer complete
ftp>
-
Open http://YOUR-ESP32-IP/oscilloscope.html with your browser.
-
If you're getting inverse analog signals, as it happens on some of ESP32 boards, comment or uncomment compiler directives INVERT_ADC1_GET_RAW and/or INVERT_I2S_READ in oscilloscope.h respectively. If your ESP32 board supports i2s interface (like ESP32 DevKitC, NodeMCU-32S, ...) you can also decide if you want to use it (or not). The benefit of using i2s interface is higher sampling frequency and quality of a single analog signal. The drawback, on the other hand, is that you can not use more than one analog oscilloscope at a time.
Things to consider when analogReading GPIOs
ESP32 has two SARs (Successive Approximation Registers) built-in among which only ADC1 (GPIOs 36, 37, 38, 39, 32, 33, 34, 35 on ESP32 board but other boards (S2, S3, ...) have different GPIOs connected to ADC1) can be used for oscilloscope analogReadings. ADC2 (GPIOs 4, 0, 2, 15, 13, 12, 14, 27, 25, 26 on ESP32 board but other boards (S2, S3, ...) have different GPIOs connected to ADC2) can perform analogReadings only when WiFi is not working. Since oscilloscope uses WiFi, ADC2 GPIOs are not available at this time.
Source and license
Original documentation: Bojan Jurca. Reproduced under MIT. Individual image credits identify any separately licensed media. The full original copyright and permission notice is retained in that license file.
Republished the complete README text. Reformatted HTML as Markdown, resolved relative links, and served repository images locally. Photos resized without cropping; diagrams retain source resolution. Externally hosted or separately unverified media is linked at its original location. Introductory selection notes are by Meteor Makers; the original author is not responsible for those notes.
Source revision: 47f4159cdb43. Retrieved 2026-10-03. This is a source snapshot, not a claim that the project was first published today or that its creator endorses Meteor Makers.